

How To Remove Transparent Background In Gimp
There are a few means to remove the groundwork of a picture and make it transparent in GIMP. This tutorial looks at how to use the 'Fuzzy Select' and the 'Select by Color' tools to delete backgrounds.
(A) DELETING BACKGROUNDS WITH THE FUZZY SELECT TOOL
The 'Fuzzy Select' tool lets you select areas of a picture that are similar in color. As y'all drag the tool downwards across the areas you want to delete, you'll detect the threshold increases. The higher the threshold, the higher the number of pixels (the expanse) you tin can select. Nonetheless, selecting a large area in one click can make your selection less precise. As a issue, you could finish upwardly deleting details of the object you want to keep in your photo.
For all-time results, y'all are brash to use the tool multiple times, selecting and deleting different areas each time instead of deleting the unabridged background in one click.
Also, pay shut attention to the areas highlighted in pinkish every bit y'all elevate the fuzzy tool across the image. When you are sure you've only highlighted areas you lot'd like to delete, but then should yous press 'Delete'.
Step-by-step tutorial:
Step ane:Open the picture whose background you would like to delete.
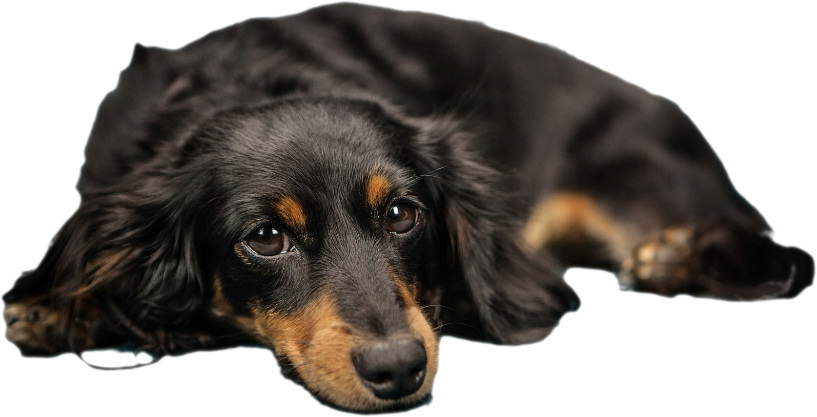
For this 'Fuzzy Select' tutorial, I will utilize this picture of a brown dog.


Pace 2:Activate the 'Fuzzy Select' tool.
Step 3:Right click the epitome layer and click 'Add alpha channel'. This volition ensure any areas deleted volition leave a transparent background.

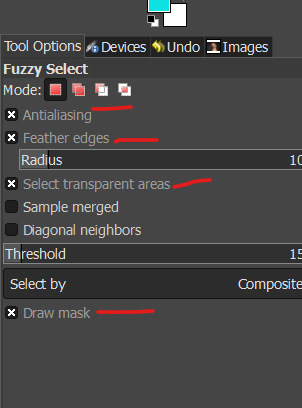
Stride 4:Then bank check the 'Fuzzy Select'tool options to ensure 'Antialiasing', 'Feather Edges', and 'Depict Mask' are all active.
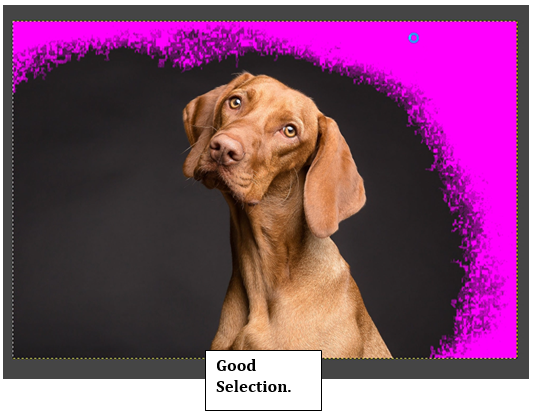
Pace 5:Elevate the 'Fuzzy Select' tool downward the area you desire to delete. Notice the selected area is highlighted in pink.

Make sure no of import details are captured in the selected area. Drag the tool up to reduce the threshold and select less areas.
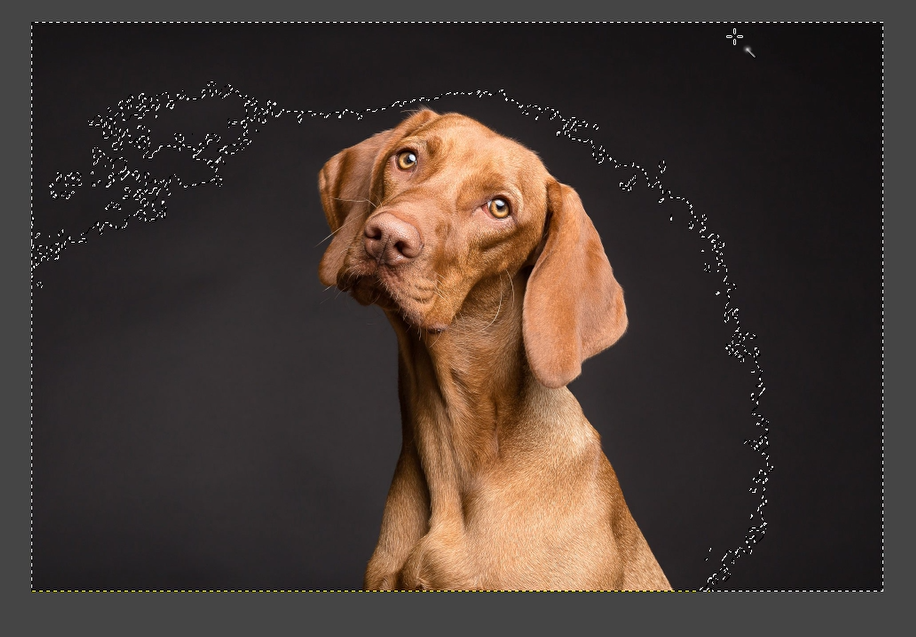
When you're satisfied with the selection, release the click. The selected surface area will be highlighted in moving dotted lines.
Footstep half-dozen: Delete the selected area.
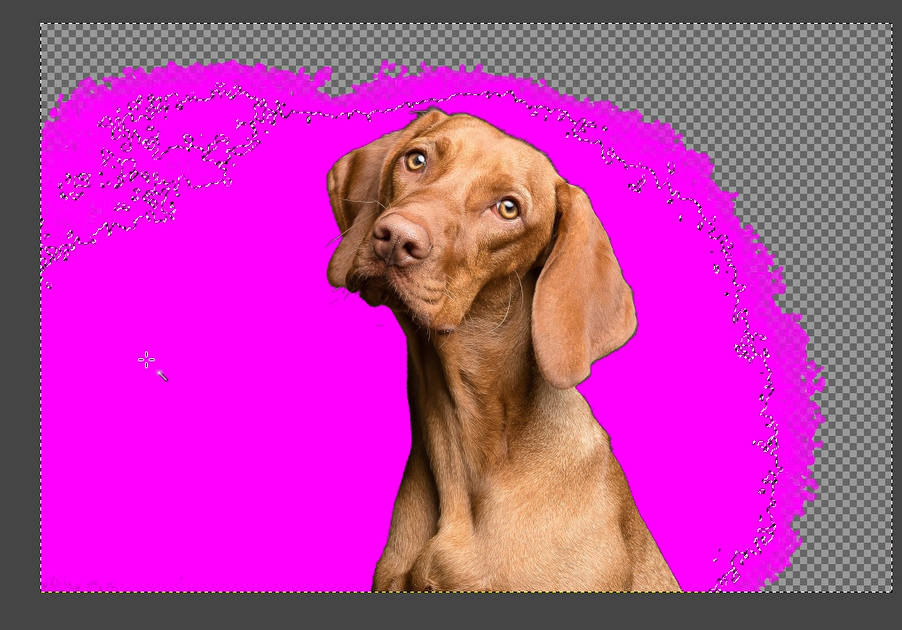
Step 7:Select new areas and delete them multiple times until the groundwork is completely transparent.

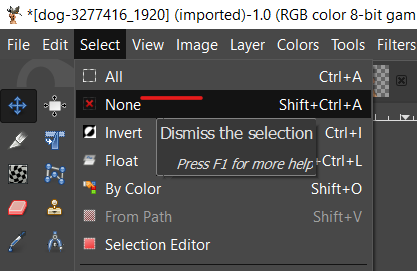
Step 8:Deselect all areas. Go to the 'select' tab and click 'None'.
Stride 9:And then, right-click the prototype layer and select 'Alpha to choice' to select the object on the transparent background.
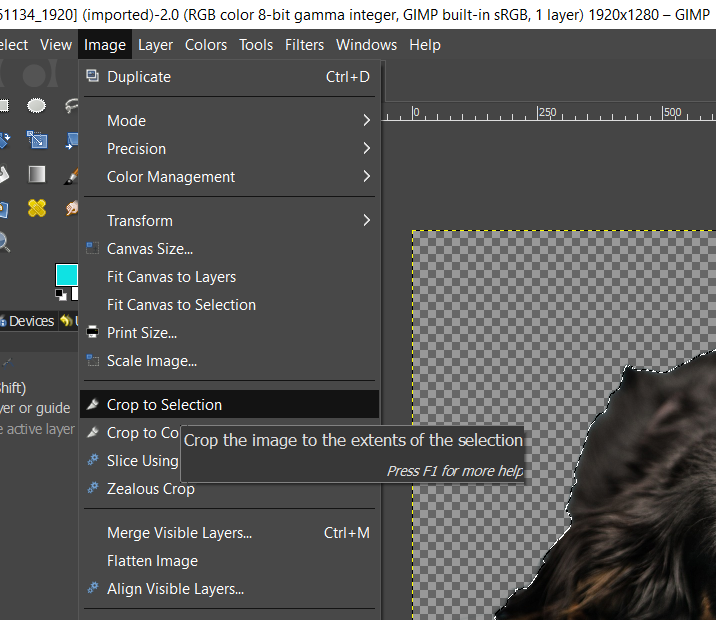
Stride ten:Become to the 'Prototype' tab and click 'Crop to Choice'.
Stride 11:Consign pic in PNG format to retain transparent groundwork.
Photograph: Brown Dog
Photograph CREDIT: Prototype past Péter Göblyös from Pixabay

(B) DELETING BACKGROUNDS USING THE 'SELECT BY Colour' TOOL
In some means, this tool is similar to the 'Fuzzy Select' tool. It also works by selecting areas of like color, and once selected, these areas can be deleted.
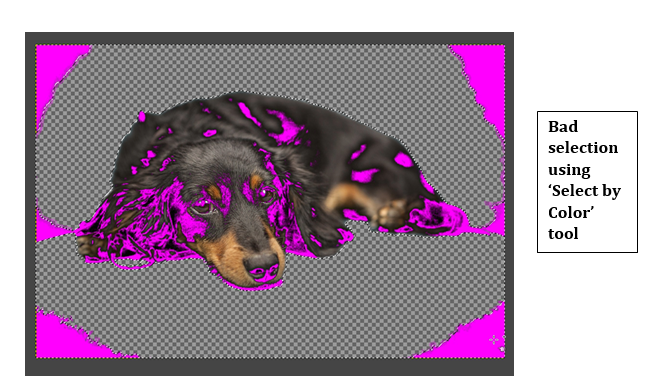
Still, the 'Fuzzy Select' tool is a bit more than precise, and equally we will come across below, it may be necessary to switch from 'Select by Colour' to 'Fuzzy Select' for best results.
Follow the steps below:
Footstep ane:Open the film in GIMP
I will employ this moving picture of a brown dachshund on a turquoise sofa.


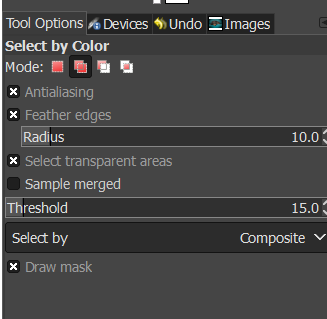
Pace two:Activate the 'Select by color' tool
Step 3:Ensure 'Antialiasing', 'Feather Edges', and 'Describe Mask' are all active in the 'Select by color' options.
Step four:Right click the image layer and click 'Add alpha channel'.
Step 5:Select areas by color and delete. Be conscientious non to select any areas containing
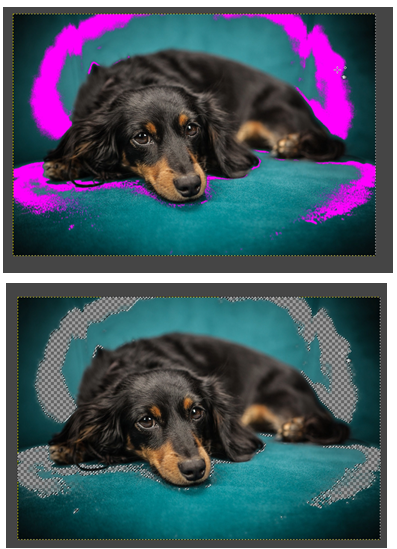
Stride half dozen:Switch to the 'Fuzzy Select' tool when 'Select by Colour' is no longer precise.
Step seven: Using the 'Fuzzy Select' tool, select the remaining sections, and delete.
Step viii:Deselect all areas past going to the 'Select' tab and clicking 'None'
Step ix:Correct click on the image layer and click 'Alpha to Pick'.
Step x:So go to the 'Prototype' tab and click 'Ingather to Selection'
If the epitome does non crop to the object in the foreground, some background artifacts have not been deleted. These remaining bits of the groundwork are probable to exist in the corners and edges of the sheet, where they're easy to miss.
In situations similar this, the 'Fuzzy Select' tool will practise a much better job. Use it to target and go over corners, edges, or areas where a few background specks or shadows could be. And every bit usual, be conscientious non to select parts of the object y'all want to go along.
Step eleven:One time the image is cropped, export it as a PNG photo to retain transparent background. Go to 'File' and click 'Consign as'.
CONCLUSION
Removing the groundwork of a pic makes it easier to use in other documents. With the background removed, you can hands embed the photograph in Give-and-take documents and even use it with more complex desktop publishing programmes where you tin place them neatly into magazines, newsletters, and other commercial design projects.
About the author
![]()
This is Rakhibul Hasan CEO and Founder of Clipping Path Creative Inc. We provide 100% handmade photograph editing services to use Adobe Photoshop. Our services are Clipping path, Groundwork removal, Colour correction, Photo retouching, Automobile photo editing, drop shadow etc. Also nosotros offer an paradigm every bit a trial to guess our quality. So contact united states and get instant reply.

How To Remove Transparent Background In Gimp,
Source: https://linuxhint.com/remove-background-gimp/
Posted by: jonesofeautioull1984.blogspot.com
0 Response to "How To Remove Transparent Background In Gimp"
Post a Comment